To see the FJ-3 pictures click here.
I first met Will Van Dyke when
we were employed at Hughes Aircraft Co. My first impression was "What a nice fellow!". When we became associated with the same Hughes
program I got to know more about his interesting background.
(Note: you can click the pictures on
this page to see full size versions.)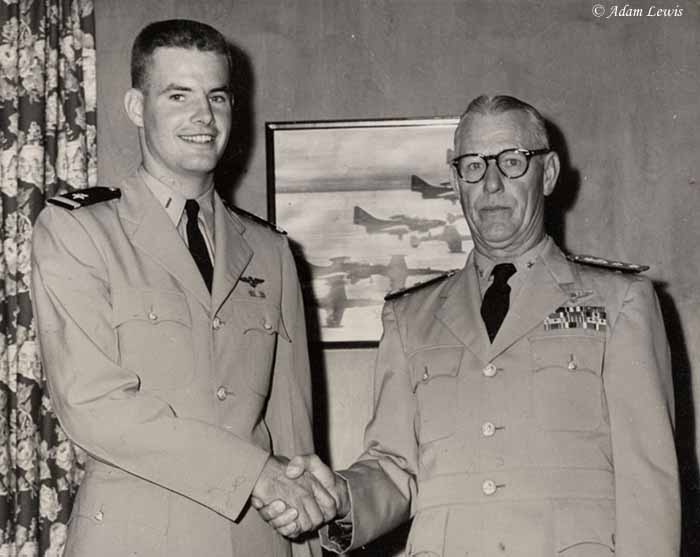
Will joined the Navy in 1952, earned his wings in 1954 (see picture) and retired in 1980 as a Captain after 28 years
of service. He flew a whole laundry list of airplanes....SNJ, F6F, SNB, T-33, FJ-3, F9F-5, F11F, F3H (click here for F3H pictures ), F4B and F8U. He was carrier qualified on
the hottest birds in the inventory. Will's a sharp cookie and the
Navy sent him to school at the Cranfield College of Aeronautics in London. Once I
found out about that part of his brain I pestered him with questions such as
the advantages of the Coke bottle shape of the Century Series fighters,
ground effects, shock diamonds, etc. Fortunately he didn't run out of
patience with me.
While in the Navy he managed the 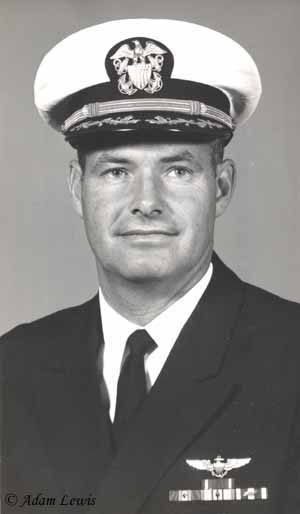 Sidewinder Missile Program. Will had a five year run as the Program Manager (PM) from 1975 - 80. A five year assignment as PM of one program is, in my experience, unusually long for a military officer. His program office was located in NavAir (Naval Air Systems Command) Headquarters, Washington D.C. At the time the Navy and Air Force programs were merged (AIM-9L/M) and Will managed both of them.
 During his tenure the Sidewinder program won the prestigious Daedalian
trophy, presented annually in recognition of outstanding weapons system
development. The recipients are selected by the individual services from
nominations submitted by Army, Navy and Air Force. When he retired Hughes Aircraft Co was fortunate enough to get him to come to work for them as a PM. A 5 year tenure as Sidewinder PM, the Daedalian Award, and being hired by one of the premier Aerospace companies...these speak volumes of his high abilities.
During his tenure the Sidewinder program won the prestigious Daedalian
trophy, presented annually in recognition of outstanding weapons system
development. The recipients are selected by the individual services from
nominations submitted by Army, Navy and Air Force. When he retired Hughes Aircraft Co was fortunate enough to get him to come to work for them as a PM. A 5 year tenure as Sidewinder PM, the Daedalian Award, and being hired by one of the premier Aerospace companies...these speak volumes of his high abilities.
This modeling project was inspired when Will retired from Hughes in 1995. The FJ-3 was his favorite plane to fly. I already had the 1/48th ESCI kit and got an enthusiastic thumbs-up on my offer to build it for him as a retirement gift. But what I thought was going to be a straightforward build turned out quite differently.
Things got off to a good start. At the beginning, Will and
I looked through my reference material and hit a nugget right away. He had
flown a gloss sea-blue Fury as part of VF-51 at Miramar in 1954. The FJ-3
sketch on the cover of Squadron’s F-86 Sabre in Color was his squadron. A photo of squadron leader Alex Vraciu’s
plane, 4-view sketches and cockpit drawings are all shown inside. The
details were just as Will remembered them, except for the red edges on the
gear doors. Will had a picture of himself in Vraciu's plane, modex 101. 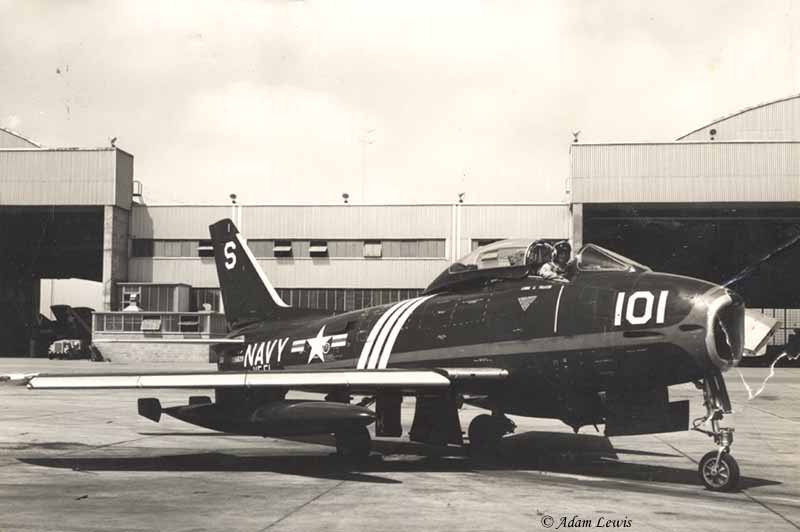 The scheme, with almost full-length red stripes ending in lightning bolts,
and 3 white fuselage bands, is colorful. It would be fun and challenging to
build. All I had to do was change the modex to 120, and add “LTJG W H VAN
DYKE” under the canopy!
The scheme, with almost full-length red stripes ending in lightning bolts,
and 3 white fuselage bands, is colorful. It would be fun and challenging to
build. All I had to do was change the modex to 120, and add “LTJG W H VAN
DYKE” under the canopy!
Before starting work I needed to find Microscale sheet 48-117, the only Fury sheet I know with the white stencils. (The sheet in ESCI’s kit is white but has a matte finish.) After a year of on-and-off search and frustration, I put an ad in the ‘wants’ section of the IPMS Journal. Fellow IPMS member Jim Clark of Phoenix sent a very nice sheet, gratis. Modelers can be pretty nice, too.
The timing of the release by Collect Aire was perfect. With the Microscale sheet in hand I was about to start on the ESCI kit. If you own one, you’ll know why I jumped at the chance to buy a Fury advertised as “a true FJ-3, no Sabre parts. Beautiful castings, petite engravings, full cockpit.” Pricey at $109.95, but not for a once-in-a-lifetime project. So, by February 1998 I had the kit, white-data decal sheet, and decent reference material. Just then, however, the El Niño hit my part of the California coast pretty hard. We took water in three rooms, including the hobby room. It was late March before I could actually start on it.
So what does Collect Aire give you for your 110 bucks? Upon opening the sturdy cardboard box I was immediately impressed by the quality of the large resin castings. You get two fuselage halves, a right and left wing, all carefully packaged to avoid breakage. The panel lines and access hatches were delicately done and appeared accurate when compared to photos of the real thing. Some of the very delicate wing fences were broken. According to Squadron’s FJ Fury in Action early Furies like Will’s didn’t have them, so I sanded them all off. If you want them for your version it will take some real finesse to have them come out right and not break off somewhere along the line.
There’s a bag of high-quality resin detail parts, another of white-metal parts and two vacformed one-piece canopies. The resin parts for the exterior include a very nice pitot tube, fuel dump, tail bumper, tail hook, fuel tanks (one piece, pylon included), refueling probe, landing-gear doors, a pair of horizontal stabilizers, air brakes, air-brake cylinders, 20mm cannon, pylons for the Sidewinders, and wheels. When the Furies became armed with Sidewinders in 1956 their designation was changed from FJ-3 to FJ-3(M). You’ll have to come up with your own missiles as none are provided in the kit. Since I was building the pre-missile FJ-3 I was not offended by their absence. All in all the exterior parts were excellent, with petite, uniform panel lines. They looked every bit to scale and cleaned up with light sanding.
The interior is another story. The instrument panel was only an outline with recesses for the instruments. Very 2-dimensional! The side consoles were devoid of any detail save some shallow lines and a few indentation points. I don’t know about you, but when I see a resin kit advertised with ‘full cockpit detail’ something like a True Details or KMC cockpit comes to mind. You get no such thing. You’ll have to build up all the surface detail yourself. There is a nice resin control stick and decent seat comprised of two white-metal and one resin piece. There are no photoetched parts.
A nice touch is the intake trunk. It’s fully enclosed and terminated aft of the cockpit with the compressor face, so you don’t get the ‘see-through’ effect. A 3-piece engine exhaust installs in the tail and has some detail.
The white-metal parts were somewhat roughly cast (mold maker must have been a tank man) but cleaned up with 600-grit paper. They’re not exquisite, but OK. The canopies were by far the worst part of the kit. The panel lines on the windscreen were wavy and its footprint way too wide. There are striations molded in the plastic, apparently tooling marks from the vacform mold. I cut the windscreen off and trimmed the excess from the canopy with sharp scissors. Sanding doesn’t work on this stuff. In the end I used the ESCI windscreen (the only ESCI part I robbed) and the Collect Aire canopy hood.
The decal sheet in the Collect Aire kit is InvisaClear by Scale Master. The two schemes are the same ones provided on Microscale 48-116 for gray Furies, less most of the stencils. If you want all the black data stencils you’ll want to get either 48-116 or 48-129. The VF-142 bird is one of the color centerfold profiles in Squadron’s FJ Fury in Action.
The instruction sheets provide clear assembly drawings, leaving no doubt where anything goes. A careful audit against the instructions revealed two missing parts and an incomplete canopy frame, all white metal. A letter to Lou Maglio at Collect Aire was promptly answered, and I had the missing parts in a week. He was out of the metal canopy frame so I had to live with what I got originally.
It was time to get started! Parts cleanup was a snap. The resin parts had about 20 small holes that needed filling, mostly on the wings and dorsal spine—very easy to fix. The fuel tanks are one piece with their pylons and needed some seams cleaned due to slight mold misregistration, a nit really. By and large the molding process left virtually no other seams. All the other resin parts were easy to prepare. A few of the small parts came on a tree and had some flash which was easily removed. You’ll probably break something—the canopy actuator rod in my case—and I bet you’ll end up making something out of metal or plastic rod before it’s over! The refueling probe, cannon barrels and actuators are good candidates.
Construction started in the cockpit. I painted the instrument panel, sidewalls and consoles gray and the instrument holes yellow. Next I added Reheat bezels blackened with “Blacken It” and attached with a few tiny drops of white glue. Take your time and do a dry layout of the bezels—I used 17—to be sure they’ll all fit over the holes. Then I dropped in punched Reheat dial decals with white glue. Console details are Reheat data placards with a few punched disks and sprue switches to give a 3-dimensional look. Assemble, paint and add some belts to the seat, paint the control stick and you’ve got 90% of the cockpit done! Then I assembled the cockpit/intake per the instructions but leaving off the control stick and instrument panel ’til later. The fit of the parts surprised me—it was quite good. Even though there are no alignment pins, there are enough edges, surface contours and stops to provide positive alignment. Throughout, I used the color sketches in F-86 Sabre in Color as a reference because of Will’s endorsement.
The 3-piece engine went together smoothly. Paint the intake trunk and exhaust, add the tail hook and you’re ready to assemble the fuselage. By the way, the kit-supplied tailhook is only a hook end that you insert into a fuselage half. The tailhook arms are not represented. If you want an accurate view from underneath I’m afraid you’re in for a lot of work as the fuselage here follows the smooth outline of the plane. On the other hand, if you want to see just the hook when viewing the plane from the side, the kit is adequate.
Before assembling the fuselage I attached the dive brakes and ammo door in the closed position, filled the seams with super glue, then sanded and rescribed their outlines. Alignment of the fuselage halves was aided by plastic strips superglued to one edge. Since the halves were of different thickness, care was needed to get the plastic thicknesses right—a dry fit saves lots of misfit problems when you’ve got super glue on the parts!
The next step was by far the trickiest. You have to align the intake/cockpit assembly to the top (bulkhead), bottom (wheel well), and sides (consoles) of the fuselage at the same time you’re gluing the halves together. Here’s where positive locators would have helped a lot. I got it almost right, but didn’t realize at the time that the top of the rear bulkhead had to align precisely to the top of the rear deck on the fuselage. I sanded down the overexposed bulkhead, and that joint looks OK, but the seat would later sit too high because the floorboard is raised. I wound up heavily sanding the seat bottom to get it back down. Do yourself a favor and save this assembly step for your most sober, steady moments. That said, the fit was again very good. The nose piece came next and all the fuselage seams were cleaned up. Most of this was because of my own inability to get the amount of super glue just right.
The wings and stabilizers were added next—I only had to enlarge the fuselage holes slightly to accept the alignment stubs. Fit here was excellent, but you’ll need to pay attention to the (slight) wing dihedral. I laid the fuselage on a table, inserted the wings and supported them at the same distance from the fuselage with a set of round sticks to produce the desired dihedral. Note that since the wings are one piece you don’t have an option to drop the leading-edge slats. As far as I can tell, this is the only thing you need to do if you want to have the Fury really look like it’s at rest.
The three large gear doors were added at this time. I first
made the mistake of cutting off the two main doors from the center-line
piece. You can find pictures of Furies with the doors up or down, and I
assumed a Fury ‘at rest’ would have them down. (Mike Mitchell sailed on the USS Lake Champlain and contributed these 2 photos of Furies from 1954 .. ![]()
![]() ) I should have asked Will
first for his preference. He explained that when on the carrier the doors
were always up. After all (...duh!) you don’t want to go careening down the
cat launch or trying to catch a wire with doors hanging! I should have just
attached the one piece of the kit instead of making three pieces out of it.
I filed off the resin representing the wingtip lights. One last thing
before painting. I had to fill and rescribe the shape of the leading-edge
slats. The early FJ-3s had a deeper set, as sketched in the in Color book.
) I should have asked Will
first for his preference. He explained that when on the carrier the doors
were always up. After all (...duh!) you don’t want to go careening down the
cat launch or trying to catch a wire with doors hanging! I should have just
attached the one piece of the kit instead of making three pieces out of it.
I filed off the resin representing the wingtip lights. One last thing
before painting. I had to fill and rescribe the shape of the leading-edge
slats. The early FJ-3s had a deeper set, as sketched in the in Color book.
At this point I spent a few hours just polishing the surfaces and rescribing lost panel lines. The resin in the kit is easy to work with. I used 1200 then 2000 grit followed by a rag soaked in Brasso (after it’s dried). After covering over the cockpit opening, I washed the model with liquid dish soap and water (with a quilted cotton pad) followed by a rubdown with alcohol—again using a cotton pad. A coat of Floquil primer 110009 was followed by finding and fixing the blemishes I’d missed earlier. Each time I spray this, I think I’ll be good enough that I don’t have to resand—but no such luck. So back to the 2000 grit. Then all was sprayed with Model Master acrylic Gloss Sea Blue. Once again I had to rub out some rough spots (dry 2000 very lightly). I left the resulting dull spots alone as these would gloss up with the overcoat.
After masking off, I sprayed Model Master non-buffing aluminum on the corrogard leading edges, exhaust ring and wheel wells. Next an overcoat of Model Master Metalizer Sealer was sprayed overall. I found I could pull it off the acrylic paint with masking tape, so be careful if you do any further masking. Drafting tape was okay.
For the markings I needed four sheets. I first did the red fuselage stripes by cutting shapes from Tauro sheet 431 ‘IT. RED FILM FS11105.’ The Tauro decal is somewhat thick, and this is a good-news/bad-news situation. Its color doesn’t change on the model—a big plus! The red looks superb, even though it’s over dark blue. However, the white bands have a discernible step where they cross the red.
The fuselage bands are from SuperScale 1/8” white stripes
(the Fury photo shows spacing between is 1/3 the stripe width) and went on
next. They were opaque and showed well, as did the data stencils from the
aforementioned Microscale 48-117. The fourth sheet was custom markings done
by Woody Vondracek. Woody’s work was superb. He did all the white items
that weren’t stencils, i.e., the 7 modex numbers, station letter ‘S’ 4 ea,![]() ‘NAVY’ 4 ea, national insignia 4 ea, VF-51 2 ea, the small ‘FJ-3’ over the
serial number 2 ea, and ‘LTJG W H VAN DYKE’ 2 ea for the minimum (1-hour)
charge. No extra charge for the revisions, either! This is the finished product...the large sheet Woody delivered contained 4 complete sets of this design.
‘NAVY’ 4 ea, national insignia 4 ea, VF-51 2 ea, the small ‘FJ-3’ over the
serial number 2 ea, and ‘LTJG W H VAN DYKE’ 2 ea for the minimum (1-hour)
charge. No extra charge for the revisions, either! This is the finished product...the large sheet Woody delivered contained 4 complete sets of this design.
Working with Woody was a good move. I couldn’t get a better set of transfers; I was fussy about the lettering since the ‘S’ and ‘5’ were not standard. Also, the first proof sheet he sent had stenciled letters (the kind with gaps in the lines), which wasn’t correct—they were solid. This and other small modifications were carried out as I wanted. It’s obvious he cares about quality and customer satisfaction. I ordered the glossy finish, but matte is available should you want it for another project. The transfers went on without a hitch and burnished down neatly—I just followed the directions he provided. My total cost for Woody was $85 (in 'then-year' dollars).
I put the Metalizer sealer on again and added wingtip lights. Will and I reviewed many photos to determine if the color was in the bulb or in the glass cover. The result was a colored bulb with a clear lens of 5-minute epoxy. The epoxy makes a conformal lens that fills the contour perfectly if you contact all the edges. Just be sure you don’t have air bubbles in the blob you apply. After adding the landing gear, small bits, instrument panel, seat and windscreen/canopy you have a very nice-looking Fury.....that sits on its tail! Fortunately, the intake trunk provides a natural place for lead weights. Only ½ ounce was needed to pull it back down. By the way, I used Future to attach the acrylic painted parts to each other. It made installing the windscreen on the fuselage easy.
The FJ-3 is 37’7” long, 37’1” wide, and 13’7” high, according to the dimensions in the In Action reference. The model measures about 1/8” too small in all 3 directions, making it closer to 1/50th scale.
This was my first resin kit. It went much better than I anticipated due mostly to the fine fit. The dearth of bubbles and delicacy of the parts stand out in my mind, too.
I can recommend the Collect Aire kit with enthusiasm, provided you get the decals/markings on your own and get another windscreen. It builds up into a very accurate-looking Fury, has delicate features that look to scale, fits very well, and has clear instructions.
 The model sits on a shelf in Will's den.
 The shelf meets the 2 basic requirements for this kind of situation...it's about 5 feet off the floor so the family pooch can't get at it, and it's enclosed by an acrylic dust cover.
Judging by the smile on Will's face the FJ-3 model made one of my favorite people happy!